
Today we’re going to be looking at the actual design of the PGL, which you were introduced to in the last tutorial.
You can test this out at https://www.rebeltech.org/patch-library/patch/PGL
1.) If you’ve already done the tap tempo delay tutorial, you should already have the template and the PGL patch that we will be using today in the OwlGenPatches-master folder. If you don’t have these, you can get them from our Github.
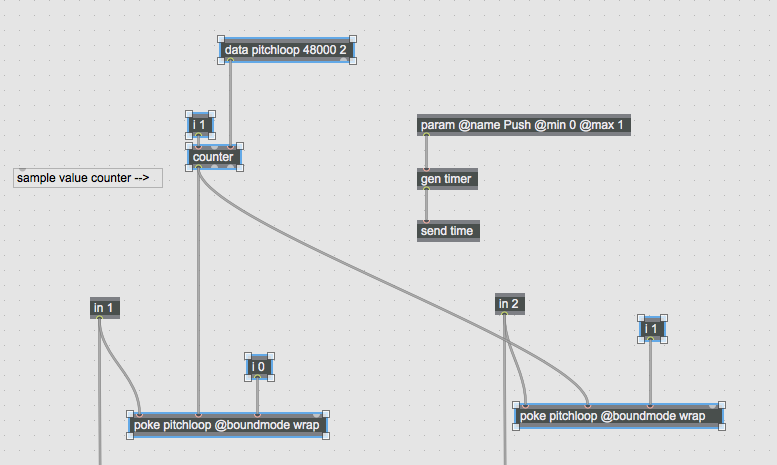
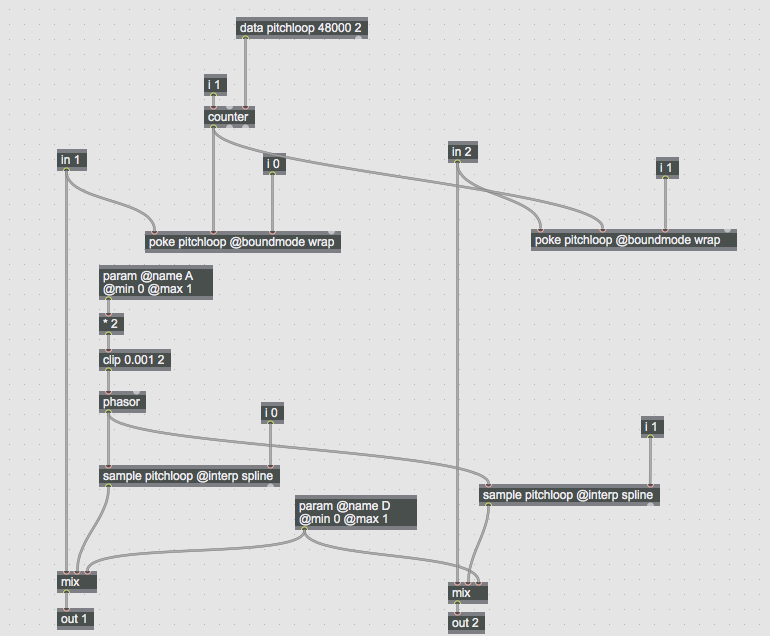
We begin with the Dev_default patch, our basic template for OWL patches in Gen. Open this, unlock the Gen patch and save it as something else – in our case, this is PGLTut.gendsp. Inside that, there is a a folder called PGL containing a Max patch called PGL.maxproj.This looks complicated, but we’ll break it down into smaller chunks and steps which we can simplify. For now, copy the objects below, which includes [data], [in], [counter], [poke] and [i], and paste them into our patch.
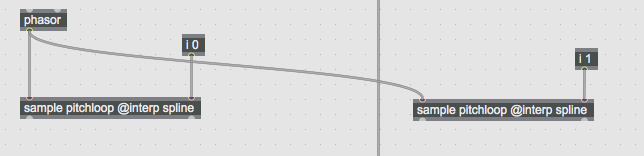
2.) Then copy the following objects from the bottom of the PGL patch, including [sample] and [i], and paste these into our patch.
3.) To these, we add a [phasor] object. Your patch should now look like this.
4.) Before we go any further, let’s look at the core concept of PGL. PGL stands for Pitch Grain Looper. Ultimately, it’s a live looping tool. Any audio signal that comes into input goes into a buffer: space in the OWL’s RAM where you can store things. You fill this space with the incoming audio, and you can play back parts of that recorded audio. When playing it back you can change pitch, direction and length. Today we’ll look at how to allocate space in the RAM, how to write values into that (ie how to record audio in Gen and on the OWL), and how to play it back (so you could use this to make a loop pedal, too!).
The first object we’ll look at is [data] which allocates RAM for sample storage. This is the sister object of the [buffer] object you’ll know from Max. [data] has an outlet that’s useful for what we’re doing: if you hover your mouse over the left outlet you’ll see it says “length in samples”. The first attribute of [data] is a name – in this case ‘pitchloop’ – this allows other objects to refer to that space in the memory too. The next attribute is the size of the buffer in samples (48000 samples is one second with our 48k sample rate) and the third attribute is the number of channels – in this case 2 (for stereo).
As soon as you set the size of the [data] object, it continually sends this out of the left inlet, which goes into the [counter] object and sets the upper limit of [counter]. The [i] object outputs the integer argument we give it, so [i 1] outputs a 1. This sets the increment of the [counter] so for every sample that passes it adds the number 1 to the outlet. This object is therefore creating a constant stream of how many samples have passed, counting from 0 to 48000. This value goes into the [poke] object.
5.) [poke] is a “pokes” the value into a specifed space in the buffer. The first argument of [poke] is the name of the RAM it’s writing into. In the first inlet of [poke], we enter the value (ie, audio) that we want to write, so we can connect [in 1] to the first inlet:
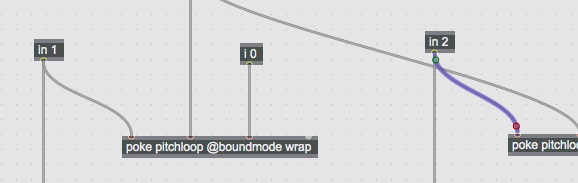 6.) The second inlet is the position we want to write to. Every time we want to write to the buffer, we need to set the position – this is why we are using the values from counter. Every time audio arrives, the [counter] tells [poke] where to write this to. The third inlet sets the channel, which starts at zero, which is set by [i 0].
This collection of objects is writing audio to the buffer, in realtime, in a one second loop, so you’ve always got the last second of audio recorded.
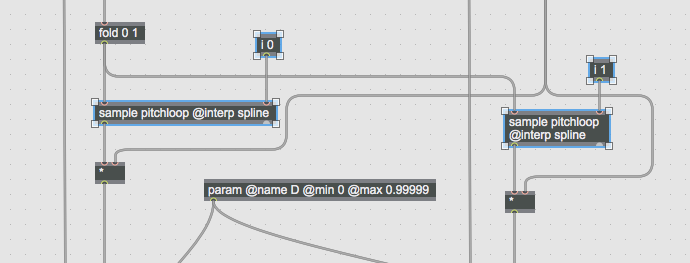
7.) Now, we need an object that reads the value that’s being written (ie, plays back the recorded audio). We will use [sample] which requires a ramp input from 0 to 1 to read through the recorded audio. For this ramp we use [phasor]. We use an argument to set [sample] to read from our buffer called pitchloop. We found the setting the interpolation (@interp) attribute to spline was the nicest, but you can try others. So, we connect [phasor] to both [sample] objects in order to use it to control playback.
8.) Add a [mix] object so we can here the difference between the dry and wet. We use [param D] to control the cross fade.

9.) Changing the frequency of [phasor] will change the rate at which we read through the buffer, ie, the speed (and pitch) of sample playback. We will set this playback speed – the frequency of [phasor] – with [param] for input A.
A [phasor] frequency of 1 will ramp from 0 to 1 once per second. Because our buffer is one second, this means it will play one second of audio back at normal speed. A frequency of 0.5 plays back at half speed (and an octave lower), and a frequency of 2 will play it back at double speed (and an octave higher).
We want to control the frequency of [phasor] by [param] which is set to output 0 to 1, and we will multiply this by 2 using the [*] object so we can play the recorded audio back up to twice as fast, and use [clip] to prevent it from ever going to 0 (which would stop playback!).
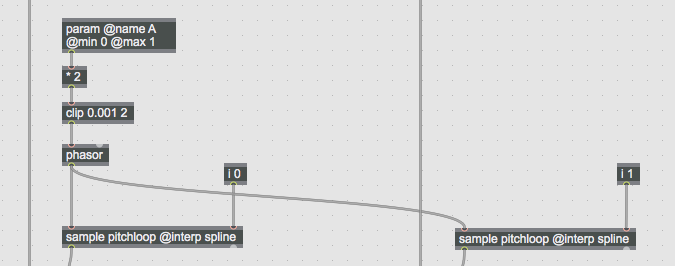
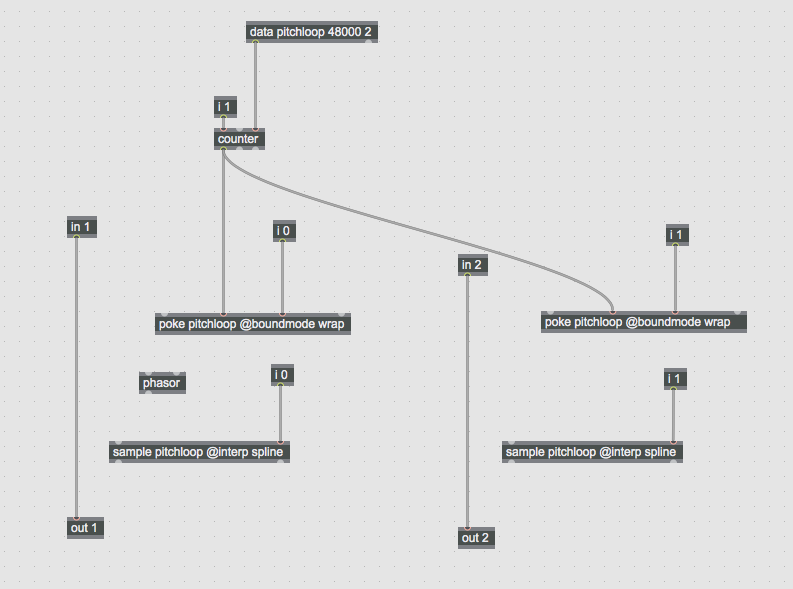
10.) Your whole patch should now look like this:
Let’s go to the top level of the patch (the main max patch) and test it out!
In the next tutorial, we’ll be looking at changing the length or direction of this and syncing it to the rest of our modular ecosystem. In the meantime, you can export this patch and play it in the browser at www.rebeltech.org, before loading it onto you OWL.
You can find more instructions about compiling Gen patches for the OWL at http://www.rebeltech.org/2016/11/owl-max-tutorial-1-getting-started/
Happy patching!